So far we've looked at selecting information from a single table, which is nice, but a relational database is "all about relationships baby." In a nutshell: linking two or more tables together to eliminate errors and redundant data.
I'm not too happy about the way this is presented in the notes we used last week, so lets take this opportunity to create a few tables for ourselves.
The Scenario
Say we wanted to describe our combined CertIV class - the students, which course they were studying and the other subjects for each course.
We could put all this information in one table. Something like...
| name | course | subject number | subject |
| John | Cert IV general | ICAB4135A | HTML |
| John | Cert IV general | ICAB4136A | SQL |
| other John | Cert IV web | ICAB4136A | SQL |
| other John | Cert IV web | ICAB4137A | JavaScript |
| Kevin | Cert IV web | ICA4136A | SQL |
| Kevin | Cert IV web | ICAB4137A | JavaScript |
You can see that John, other John and Kevin are all studying SQL, and that other John and Kevin are also studying JavaScript while John is styding HTML
There's a lot of redundant data here which is bad for 2 reasons:
- I'm lazy and don't like typing all that stuff in more than I absolutely have to, and...
- I'm not very careful and can easily mistype some information (for example leaving out the 'B' in 'ICAB4136A' in Kevin's SQL record.
courses
| courseID | course |
| 1 | Cert IV general |
| 2 | Cert IV web |
students
| studentID | name | courseID |
| 1 | John | 1 |
| 2 | other John | 2 |
| 3 | Kevin | 2 |
subjects
| subjectNumber | courseID | subject |
| ICAB4135A | 1 | HTML |
| ICAB4136A | 1 | SQL |
| ICAB4136A | 2 | SQL |
| ICAB4137A | 2 | JavaScript |
So, there's less typing to get the information in, but a trade off in that now we have to do some more digging to get it back out.
For example, to find out what subjects Kevin is studying we have to get the courseID from his student record, and use it to look up records in the subjects table that have the same courseID.
Let's put this data into some real mySQL tables.
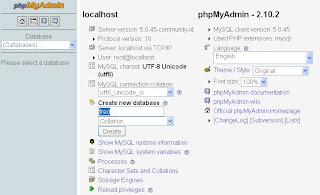
Fire up XAMPP (run xampp-control.exe). Start the apache and mySQL servers and open http://localhost in your browser. Now select phpMyAdmin from the tools menu and select the database we created last week.
Ready to create your first table?
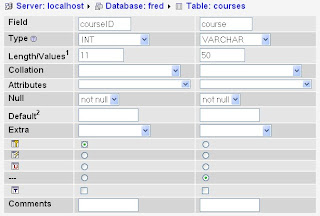
Enter 'courses' in the table name and '2' for the number of fields...
 We're going to make our courseID an integer (max length 11 digits), and the course field a varchar (variable character width) with a maximum size of 50 characters.
Click on the 'Save' button to create your new table.
You can read more about the various mySQL field data types in the reference manual. Once you have your head around datatypes, click on the 'Database: fred' link at the top of the page and add the other 2 tables: 'students' and 'subjects'. Make sure that the courseID field in each is the same data type and size as the one we just made in the courses table. I'll leave it to you to decide what datatype to use for the studentID in the students table.
Time to enter some data.
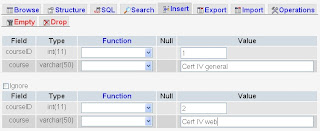
Click on the 'courses' table link in the left hand column of phpMyAdmin, then click on the 'Insert' tab at the top of the page and enter our two courses...

Click on the 'Go' button and you'll have 2 brand new records added to your table.
Bonus: you also get some free SQL script that shows how a hard core SQL programmer would do the same thing:
INSERT INTO `fred`.`courses` (
`courseID` ,
`course`
)`course`
VALUES (
'1', 'Cert IV general'
), ( '2', 'Cert IV web'
);Select and insert our data into the students and subjects table (you may have to click on the insert tab a couple of times to get it all in).
Whew... I'm getting tired here just thinking about all this, but before we go I suppose we should look at how to select our data from 2 tables.
Let's take our earlier example - listing all the subjects Kevin is studying.
Click on the SQL tab at the top of the page and enter this code:
SELECT name, subject FROM students, subjects WHERE students.courseID = subjects.courseID AND name = 'Kevin'
You should see that Kevin is enrolled in SQL and JavaScript.
As a quick exercise, try listing all the subjects along with their courses
Image: 'Join Us'
www.flickr.com/photos/16682940@N00/94736480


